- Contact Person : Ms. Wang Sophie
- Company Name : Jinan Tianchen Testing Machine Manufacturing Co., Ltd.
- Tel : 86-531-88606113
- Fax : 86-531-88607888
- Address : Shandong,JINAN,TIANCHEN INDUSTRIAL PARK, TIANCHEN ROAD, HIGH AND NEW TECH DEVELOPMENT ZONE, JINAN
- Country/Region : China
- Zip : 250101
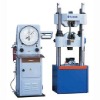
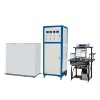
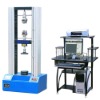
COMPUTERIZED ELECTRO-HYDRAULIC UNIVERSAL TESTING MACHINE
Detailed Product Description
1. Name: Computerized Electro-hydraulic Servo Universal Testing Machine
2. ModelWAW-300Worm gear drives
3. Uses: The machine is mainly used for the tensile, compression, bending and shearing test of metal and non-metal. It is used by aviation, aerospace materials test, quality test, colleges and universities, mining industry, technical department and so on. The test operation and data processing is meeting to GB228-2002. It is also meeting to GB, ISO and many other test standards.
4. Main technical specifications:
a. Max. test force: 300 kN;
b. Measurement range of accuracy: 2%-100%; there is 4 subsections (1, 2, 5, 10);
c. Control range of stress rate: 1-60MPa/S;
d. Adjust range of test stress rate: 1N/mm2S-1-60N/mm2S;
e. Adjust range of test strain rate: 0.00025/S-0.0025/S;
f. Precision of deformation measurement: ±0.5% F.S;
g. Subsection of deformation measurement: ×1×2×5×10
h. Precision of displacement measurement: ±1%
i. Control range of displacement rate: 0.5mm/min-50mm/min
j. Test tensile space: 750mm;
k.Test compression space: 650mm;
l. Clamping diameter of round specimen: φ6-φ36mm
m.Clamping width of flat specimen: 70mm;
n. Clamping thickness of flat specimen: 0-15mm
o. Diameter of uopper and lower plate: φ130mm;
p. Piston travel:250 mm
q. Distance of bending roller: 30-580mm;
r. Deformation measurement: Standard configuration: standard distance 50mm; extensometer that its Max. deformation is 25mm; subsection is 1, 2, 5, 10, the precision is ±0.5%FS of reading value from 20% of full travel;
s. Software and users interface: software and interactive dialogue with the computer interface under windows;
t. Power supply: 3-phase 4-wire, 380V 50 Hz, total power 2Kw;
u. Dimension: Host machine 905×580×2260(mm) Control box 600×600×1165(mm)
v. Weight: Host machine 2720kg, control box 400kg.
5.Standard configuration:
a.Host machine
b.Servo control special oil supply
c.High-precision special electro-hydraulic proportion servo valve
d.Multi-channel program-control amplifier
e.High-precision oil pressure sensor
f. Import Japanese photoelectric encoder
g.PC control system (general software and interface system)
h.Dell computer, 17-inch LCD monitor according to the customers needs
i. HP A4 color inkjet printer
j. Maxtest: Special software for testing machine that its function is very strong
k.UTB-P power control box; it is enlarge the power of valve group
l. Electronic extensometer: it can measure Rp0.2(p0.2)Rsl(sl))Rm(b) R p0.05(p0.05) and E
m.Each one grip for tensile, compression, bending and shearing test
6 . Features of measure and control system:
The AD800 full-digital closed-loop measure and contorl system is advance and creative
a.Foreign electronic components, digital design.
b.Meeting to PCI2.1 standard; the computer identify and install automatically, work if connect.
c.Integrated dual-channel precision amplifier, digital zero.
d.The data acquisition contains 4 high-precision and 18 A / D converter. The Max. resolution is 1/200000. There is no subsection or 4 subsections according to the users needs.
e.3 photoelectric encoder inputs; the orthogonal codes pulse can be 5MHZ; it can find and correct mistakes, identify, count and so on.
f. There is no manual components in electronic measurement and control system; it can ensure to change easily.
g. Build-in CPLD, it can high-speed calculate and real-time process.
7. Functions and features of MaxTest:
a.est moduletest software main interface, test control center;
b.Parameter management authority: Operators of non-debug can not enter the parameters this module;
c.New data module: can make the new test parameters data by a single or batch of;
d.Curve analysis module: the users can analysis the curve after the test. The user can find the every point of curve by the mouse.
e.Data inquiry module: the user can quickly find test data they need from the thousands of test data if they know nay parameter.
f. Parameter debugging module: control unit of machine control parameter;
g.Report print module: edit test report by the needs arbitrarily.
h.Control program editor module: the user can order the special control program by the actual needs.
8. MaxTest is with many ancillary procedure:
a.Debugging toolbox procedure: open it, and then can change the configuration parameters of system;
b.Batch processing program: it can process the test data that they have the same batch, serial date and other same signal.
c.Report processing program: MaxTest.DOC, MaxTest.xls and high-defined report, can make the user edit the format statements.
d.MaxProgrammer: the user can order the special control program by the actual needs.
e.Intelligent operation, the users provide the suggest airing the test and operate it easily.
f.Control function: it contains many control modes. The simple program includes isokinetic stress, isokinetic strain, isokinetic displacement, displacement maintaining and force maintaining and many closed-loop control modes; the multi-program includes metal tensile tests and so on. PID control algorithm adjusts the load process. Isokinetic control error ≤5%, pressure maintaining error ≤0.5%; it supply the professional Control program editor software; the user can choose the program for his needs.
g.Test force overload protection; it can record and can be found later.
9. Main features:
a. Load measurement: high-precision oil pressure sensor, high-precision oil tank piston; they ensure the high precision and high reliability. The linear repeatability is good, the impact is strong, reliable and has long life.
b.Displacement measurement: import photoelectric encoder, high-precision, reliable.
c.Deformation measurement: high-precision strain extensometer is reliable and economical.
d.Automatic clamping: single hydraulic clamping oil supply; automatic and reliable clamping, high safety.
e.Multiple protection: double protection for hardware and software; double protection piston travel for mechanical and electric; protect itself automatically when exceeding 2~10% of Max. load.
f.Automatic calibration: calibrate the load, deformation and displacement automatically.
g.Getting the test results: get the ReH ReLFmRp0.2Rt0.5RmE results automatically.
h.Management of database: manage the test machine software by Access database.
i.Preserve the data interface, can be connected with Internet directly and share the resources.
j.Compact structure: more reasonable structure. Lowering the height that the test space is same.
k.Worm and wormwheel drive structure adjusts the test space, airing the curse, not to need the leading screw. The driveline and positioning is completely separated. The loading system geometric center and force center is consistent. Thus ensures the coaxial of upper and lower jaw and the durability of the host machine.
l. Multiple control modes: force, displacement and deformation three closed-loop, multiple controls that contain metal tensile test and so on. The professional Control program editor software, which is customized by the uses actual needs.


